🔞 Not Safe For Work content is ahead, please, NO minors! 🔞
Lighting
Lighting will make or break your render, so it's important to understand how it works, and how it can be utilized. Here we'll go over the various settings of SFM lights, the difference between the two major types of lighting available in SFM, and how I typically use them in my renders.
Use the overview below to jump to the section that most interests you.
Overview
Light Settings
First things first, the parts that make up a light spawned inside SFM.
| property | Default Range | Default Value | Explanation |
|---|---|---|---|
| intensity | 0-1000 | 500 (0.5) | Affects how brightly the light shines. |
| ambientIntensity | 0-1* | 0.25 (0.25) | Unknown, no apparent effect. |
| horizontalFOV | 10-120 | 45 (0.318182) | The angle (in degrees) that the spotlight shines. Actual value used is the greater between this and verticalFOV. |
| verticalFOV | 10-120 | 45 (0.318182) | The angle (in degrees) that the spotlight shines. Actual value used is the greater between this and horizontalFOV. |
| radius | 0-50 | 0 (0.0) | Applies a jitter-like effect to the light, scattering it.1 Not visible outside of the active camera view in the Clip Editor! |
| shadowFilterSize | 0-24 | 3 (0.125) | Controls the sharpness of shadows cast by this light. 0 is totally sharp (shadow edges will appear pixelated if no radius is set!) |
| shadowAtten | 0-1* | 1 (1.0) | Controls shadow opacity. 0 causes fully black shadow (if no map lighting is present). |
| minDistance | 1-300 | 10 (0.0301003) | The minimum distance from the light's origin before light starts being cast.2 Must be less than maxDistance. |
| maxDistance | 60-3000 | 600 (0.183673) | The maximum distance from the light's origin that the light reaches.2 Must be greater than minDistance. |
| constantAttenuation | 0-1000 | 0 (0.0) | Light falloff constant ratio.3 Constant lighting keeps its full brightness over its distance. Multiplies intensity by 10000. |
| linearAttenuation | 0-1000 | 0 (0.0) | Light falloff linear ratio.3 Linear lighting loses its brightness linearly (aka at a flat rate) over its distance. Multiplies intensity by 100. |
| quadraticAttenuation | 0-3000 | 1500 (0.5) | Light falloff quadratic ratio.3 Quadratic lighting loses its brightness quadratically (aka at an increasing rate) over its distance. |
| shadowDepthBias | 0-0.001 | 0.00008 (0.08) | Adjusts how sensitive the light is to casting shadows. If set below 0, a strange "Rimlight-like" effect occurs. If set above 0.1, shadows are effectlively disabled (though you probably won't get the render time boost of actually disabling shadows!) |
| shadowSlopeScaleDepthBias | 0-10 | 2 (0.2) | Adjusts the graininess of the light, with lower values being grainier. If set below 0, artifacts around polygon faces start becoming apparent. |
| farZAtten | 0-3000 | 750 (0.25) | The maximum reach of the light. |
| nearEdge | 0-5 | 2 (0.4) | Uberlight only. Controls the sharpness of the cutOn. 0 is perfectly sharp. |
| farEdge | 0-200 | 100 (0.5) | Uberlight only. Controls the sharpness of the cutOff. 0 is perfectly sharp. |
| cutOn | 0-200 | 10 (0.05) | Uberlight only. Moves the starting edge of the light (similar to minDistance). |
| cutOff | 0-1200 | 650 (0.541667) | Uberlight only. Moves the ending edge of the light (similar to maxDistance). |
| volumetricIntensity | 0-10 | 1 (0.1) | Strength of volumetric effect, relative to intensity. |
| noiseStrength | 0-1* | 0.8 (0.8) | Volumetric noise. More noise makes volumetric effects rougher and dimmer. |
| width | 0-10 | 0.3 (0.03) | Uberlight only. Horizontal size of the light. |
| edgeWidth | 0-10 | 0.05 (0.005) | Uberlight only. Horizontal size of the edge fade of the light. 0 is perfectly sharp edge. |
| height | 0-10 | 0.3 (0.03) | Uberlight only. Vertical size of the light. |
| edgeHeight | 0-10 | 0.05 (0.005) | Uberlight only. Vertical size of the edge fade of the light. 0 is perfectly sharp edge. |
| color_red/green/blue/alpha | 0-1* | 1 (1.0) | Color components of this light. Alpha has no apparent effect. |
| *Cannot be Remapped 1This also fractions the intensity of the light between the "pieces." Overall brightness shouldn't be affected but very low intensities could get rounded to 0. 2Note that this distance is calculated per model. If a light reaches one part of a model, it hits all of it, but not necessarily every other model attached to it. Can make lighting on characters wearing cosmetics look really bad if they're on the cusp of the light's reach. 3See here for more info/examples. These are for map lighting but act similarly in SFM lights. | |||
Right clicking on the light dag in the Animation Set Editor also gives us more options for editing it. Those are:
Set Light Gobo Texture
Opens the texture browser and allows setting a texture used as the gobo for this light. Default is effects/gobo_radial.vtf. Note that any texture can be used, though typically you want to use a clamped texture.
Please don't let this dry explanation fool you, gobos are fucking awesome and you're doing yourself a disservice if you aren't ever using them.
Hover over the examples to see the gobo texture used.

The first example is effects/blindsgobo.vtf, included with SFM. The second is a gobo I made. Try it for yourself!
Enable/Disable Light Frustum
Whether or not an in-editor representation of the light should be shown. Default disabled. Note that, by default, if frustums are drawn, they will show up in your render. Largely a debugging feature, though can be useful when high precision is needed, especially for uberlights.
Disable/Enable Shadows
Whether or not world geometry and models should block this light, producing shadows. Default enabled. SFM by default has a shadowed light limit of 8. You can (and should) raise this. (It seems there is now a script for this process) Note that if a light doesn't need to produce shadows for your render, you should disable it. Every shadowed light requires the scene to be rendered an additional time, so disabling unneeded shadows on any lights reduces render time.
Enable/Disable Volumetrics
Whether or not to draw volumetric effects for this light. Default disabled. Good for things like light shafts, sun beams, or lights shining through fog.
Viewing our Light in the Element Viewer shows us more options yet. Most of these are tied to previously described settings, so only elements unique to the viewer will be listed. Those are:
animationTime
todo: Presumably for animated light textures. Default value 0.
frameRate
todo: Presumably for animated light textures. Default value 24.
ambientOcclusion
Sets the amount of ambient occlusion this light shows. 1 for full strength, 0 to totally disable. Default value 1.
uberlight
Turns the light into an uberlight, which changes its functionality. Default disabled.
roundness
Uberlight only. 0 and below breaks the light, disabling rendering entirely. Values between 0 and 1 cause rounded corners on a rectangular shape. 1 for perfectly circular. Values greater than 1 causes edges to curve inward, 2 makes a perfectly straight diamond shape. Values above 2 make an astroid-like shape, with higher values bringing the curves further in. Values around 16 or higher essentially block out the entire light. Default value 0.8.
SFM Lights vs. Map Lighting
The lights spawned in SFM are totally separate from map lighting, and function differently as well.
| SFM spawned lights: | Map lights: |
|
|
| That said, they share many attributes, too. They are both: | |
| |
Lighting Usages
So, actually using lights. There's so, so many ways to go about it, and it'll vary from piece to piece, but here's some general setups I typically use.
Like a lot of things, sometimes less is more with lighting. Especially if you're using a map that already has lighting, you might want to avoid using too many lights, lest you blow your whole image out. On maps with lighting already in place, if you want or need to use your own lighting, it wouldn't hurt to put your setup somewhere that's a little darker/shaded so you can then light it up yourself.
One very useful tip for posing lights: You can drag the light dag onto a viewport to see from that light, and more importantly, move it around in the same way you can move a camera. Some notes:
Like cameras with controls added, you can only move the light while it's selected.
Volumetrics can make it difficult to see what you're doing in this mode. Probably best to disable them until the light is where you want it to be.
Your FOV in this light view is controlled by the horizontalFOV of the light.
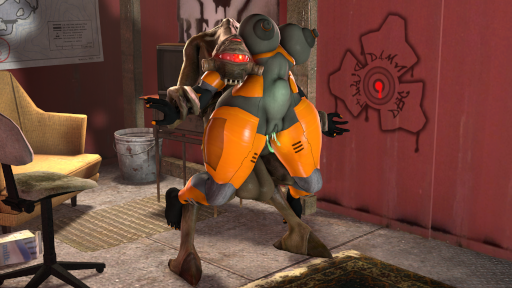
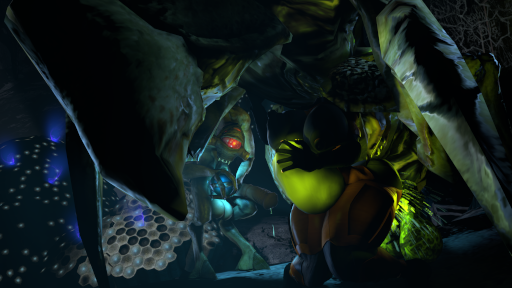
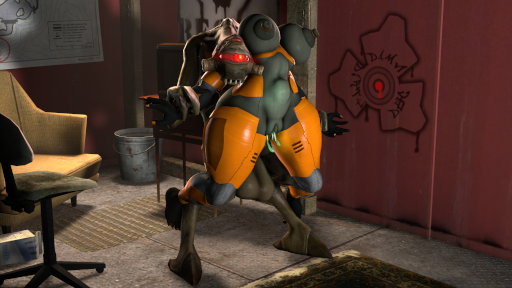
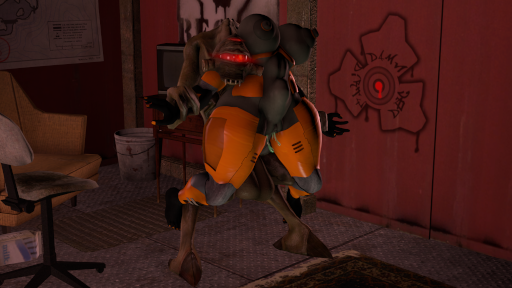
For the following topics, we'll be using this piece and this piece as examples.
Fill Lights
Fill lights add some color to the shadows of a piece. These are only used for scenes without map lighting, as a map's ambient lighting already handles this. My setup for them goes as this:
Spawn your light. Edit its values like so:
- Disable shadows
- verticalFOV to max
- maxDistance to max
- farZAtten to max
- Set the red/green/blue to taste. You typically want it to be somewhat saturated, without going too overkill. Try to compliment your primary light source.
- constantAttenuation to max
- quadraticAttenuation to 0
- Your intensity should be very low. On an unedited range, a value of around 0.000025 to 0.00005
This first light should point towards the front of your scene. Copy and paste it, and move this copy to the right of your scene, with it facing the scene. Repeat this until you have 6 fill lights: in front, left, right, behind, above, and below your scene, all pointing in. Like so:
Here's our example piece, without fill lights. Hover over to compare. Click and hold to see the piece with only fill lights active. Note that this piece is very dark, so our fill lights take up much more of the bulk of the lighting than they would on a more lit piece.
Bounce Lights
Similar to fill lights, and sometimes intertwined with them, are bounce lights. When a very bright light source hits a very vibrant or reflective object, the light will bounce off of that surface with the surface's tint. (In general, all objects bounce some light. This is how we see. Here I'm specifically referring to bounced lighting hitting other objects.)
Generally lower intensity, wide FOV lights with short maxdistance/farzatten (sometimes with shadows disabled if that winds up looking better) that are placed close to, and pointing away from, walls/floors or other objects that are being hit by a brighter light that you want your bounce coming from.
Here's an example, without bounce lights. Hover to compare. Click and hold to see the piece with only bounce lights.
Rim Lights
I mainly use rim lights to help make the subjects of a render pop from the background. Especially if the subject is similiarly colored to the background, a bit of rim light can help really define their silhouette.
Rim lights are, generally speaking, lights placed in a way to only catch the edges of subject(s) in our scene. Because of this, their placement is largely dependant on where the camera is. Roughly speaking, they're about a one-third turn from the camera, though they can be as little as a quarter turn to as much as almost shining back against the camera. Their settings will vary depending on the piece. For colors, sometimes you want them matching your primary light, other times you may not. They're one of the most purely-artsy types of lighting, so don't be afraid to experiment!
Their positioning will also depend on the object you are trying to light. A rounded edge will have the rim light pointing more towards the camera while being positioned more behind the object, whereas a very sharp edge will have it turned more perpendicular to the camera and to the side of the object.
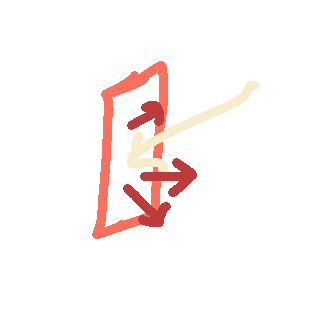
Adding a bit of radius to your rim light can help it better spread around the area you want it on. Radius is a very touchy slider, typically I don't go above 0.1 on its normal range. Keep in mind you can only see the effects of radius when you're in clip editor mode (![]()
![]()
![]() ), looking through your active camera. If you see your samples start ticking up,* you're in the right place to see the effects of radius.
), looking through your active camera. If you see your samples start ticking up,* you're in the right place to see the effects of radius.
Once the samples have finished counting up, they'll (falsely) say that they're back at 1/X.
Their positioning will also be affected by objects you don't wish to light. Generally speaking, the more subjects in a scene, the more tightly controlled the rimlighting has to be to not bleed over onto other objects. Generally I try to achieve this in SFM itself, but sometimes you just need to edit in post to get your rimlighting exactly how you want it.
Gobos can help your rim lights to only hit what you want them to. For example, if you have a rim light that is hitting the floor of your piece, you could try effects\gobo_circle_top.vtf from the SFM Beta pack(262.87MB) to turn your light into a semi circle that doesn't shine on the bottom.
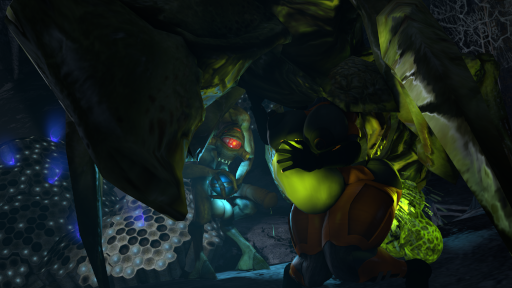
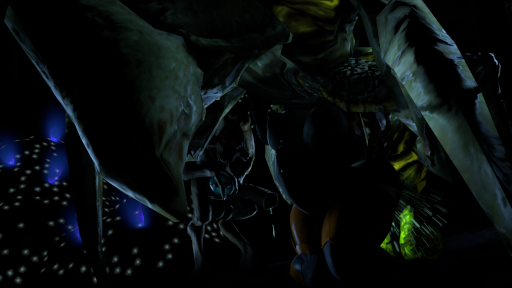
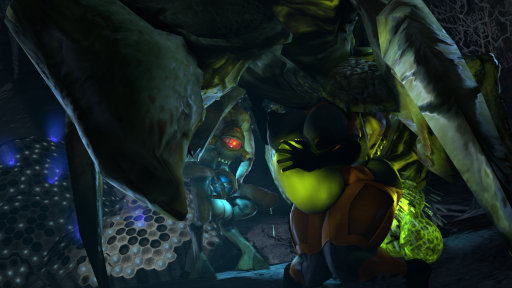
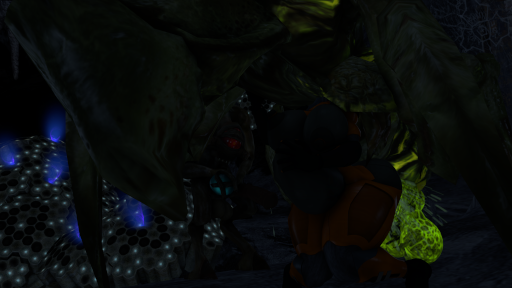
Here's an example of one rim light. This is the rim light on the back leg of the Antlion Guardian. Hover over to see it from the camera view.

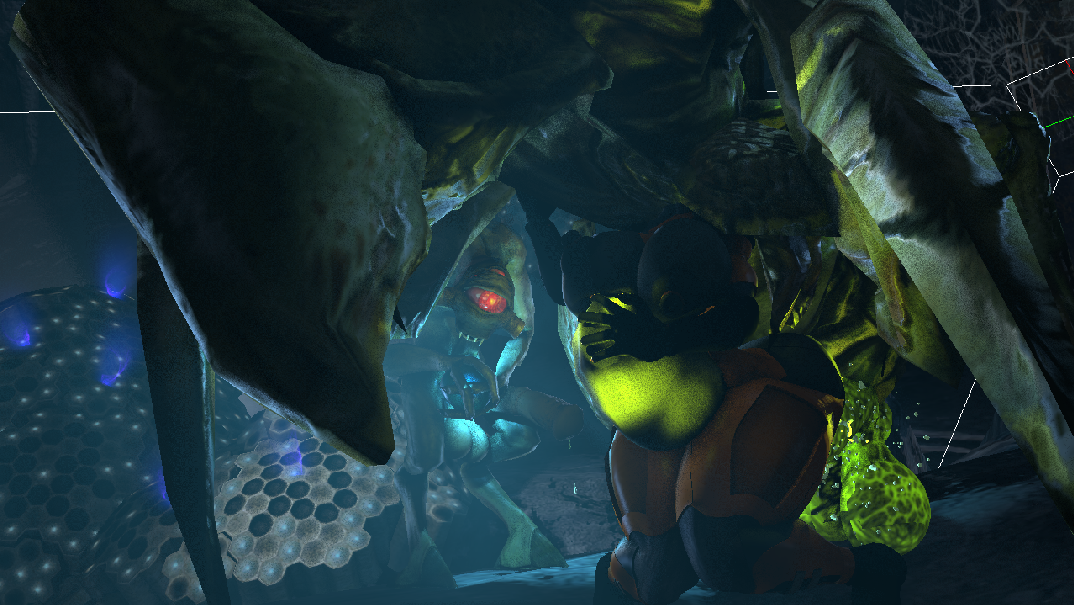
Here's our example piece, without rim lights. Hover over to compare. Click and hold to see the piece with only rim lights active.